The first time I shipped a feature that genuinely needed a queue, I didn't know that's what I needed. I had a signup endpoint that was also sending a welcome email, also pushing a "new user" event to the CRM, also resizing a profile photo, also firing a webhook to a partner — all of it inline, in the request handler. It worked. Then one day the photo resizing service had a hiccup, and every signup started timing out at the 8-second mark. I spent two hours debugging the wrong layer. The actual problem was a shape problem: I was trying to make a user creation endpoint do five other things, and the moment one of them got slow, the whole flow died with it.
That story is the entire case for queues. Most things in a web app don't need to happen right now — they need to happen eventually, in the background, by someone else. Once you accept that mental model, the question becomes: which queue do I reach for? In Node.js, the answer I keep coming back to is BullMQ.
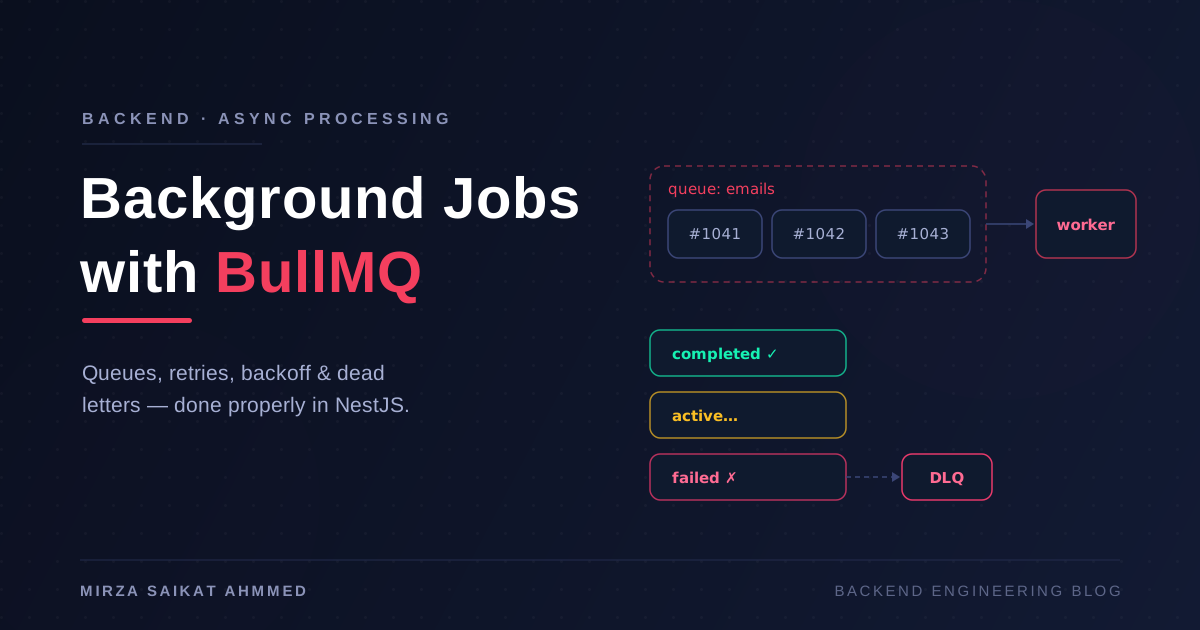
If you've already read my deeper post on Background Jobs in NestJS with BullMQ, this is the prerequisite — a from-zero intro with no framework attached. If you haven't, you can read them in either order; this one will stand on its own.
What is a job queue, really?
Strip the jargon away and a job queue is three things:
- A place to put work that needs to happen later.
- A list of workers that pick that work up and do it.
- A set of rules about ordering, retries, timing, and failure.
The "place to put work" is almost always Redis in the Node ecosystem — it's fast, it's already in most stacks, and it gives you durability, atomicity, and a pub/sub model that maps cleanly onto "jobs that have been added" and "jobs that have finished."
You don't need a queue when:
- The work is fast and synchronous (writing a row, hashing a string).
- The work only matters in the same request (returning JSON).
- You only need it to happen once in the future and
setTimeoutis fine.
You do need a queue when:
- The work is slow or unreliable (email, PDF generation, third-party APIs).
- You want retries with backoff that don't block the user.
- You need priorities, schedules, or rate limits ("send this in 10 minutes," "do this 100 times a minute").
- You're going to scale workers horizontally and need them to share the load.
If any of those describe your problem, read on.
What is BullMQ?
BullMQ is the most actively maintained job queue for Node.js. It's the modern successor to Bull, rewritten on top of Redis Streams (instead of Redis lists) and rebuilt with first-class TypeScript support, granular concurrency controls, and a much better worker lifecycle. If you're starting a new project in 2026, you should pick BullMQ over Bull — Bull still works, but the ecosystem (boards, dashboards, integrations) is now firmly behind BullMQ.
What you get out of the box:
- Priorities — run critical jobs first.
- Delayed jobs — schedule work for a specific time.
- Repeatable jobs — cron-style recurring tasks, managed by the queue itself.
- Retries with backoff — fixed or exponential, per-job.
- Rate limiting — bound the throughput of a queue across all workers.
- Concurrency — process N jobs in parallel per worker.
- Parent/child workflows — build pipelines where one job spawns the next.
- First-class TypeScript — proper types for jobs, data, and results.
- Stalled-job detection — a worker that crashes mid-job doesn't kill the work.
Most of those features matter eventually. None of them matter on day one. Day one is queues, producers, and workers. Let's build that.
Prerequisites
- Node.js 18+ — BullMQ uses modern Redis client features.
- Redis 6+ — running locally, in Docker, or wherever you like.
- TypeScript (recommended) — you can use plain JavaScript, but the types save you from a class of bugs that show up at the worst time.
Running Redis locally
The fastest way is Docker. If you don't have Redis already:
docker run -d -p 6379:6379 --name bullmq-redis redis:7-alpine
If you'd rather install it directly, the Redis quickstart covers macOS, Linux, and Windows.
Verify it's up:
redis-cli ping
# PONG
Project setup
mkdir bullmq-demo && cd bullmq-demo
npm init -y
npm install bullmq ioredis
npm install -D typescript @types/node ts-node
bullmq is the queue itself; ioredis is the Redis client BullMQ recommends. They're separate packages because BullMQ is transport-agnostic in principle (you can plug in a different client), but in practice ioredis is the one you want — it's mature, well-maintained, and BullMQ requires a setting (maxRetriesPerRequest: null) that BullMQ's own bundled client also configures.
Add a minimal tsconfig.json:
{
  "compilerOptions": {
    "target": "ES2022",
    "module": "commonjs",
    "strict": true,
    "esModuleInterop": true,
    "skipLibCheck": true,
    "outDir": "dist"
  }
}
The three things you need to know
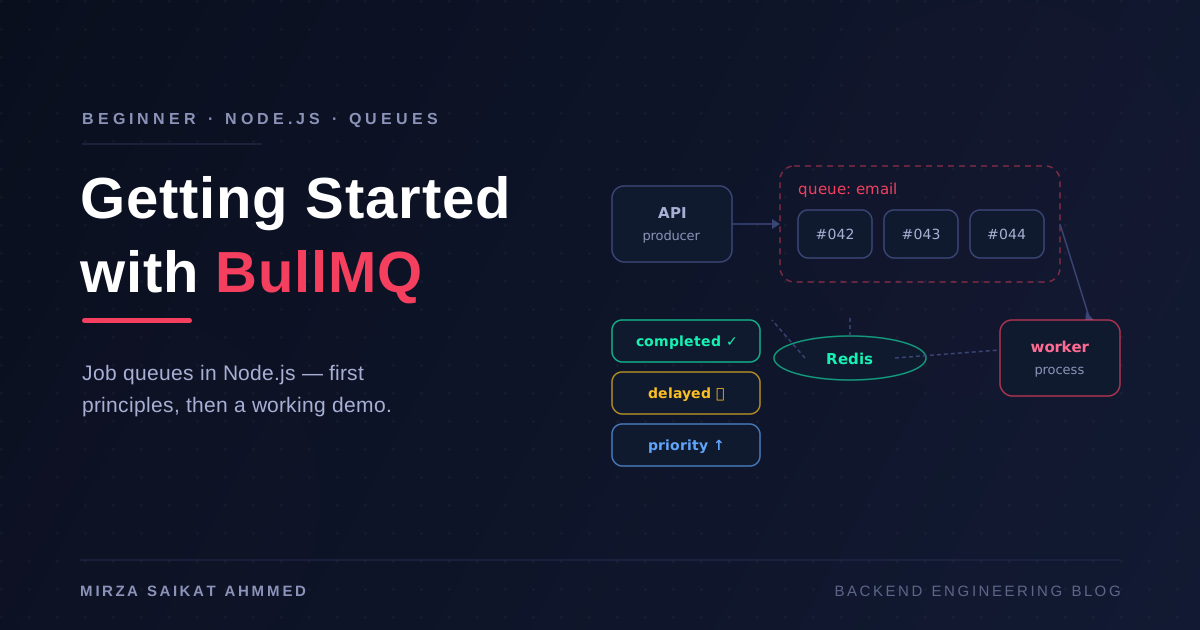
Every BullMQ app is built from three pieces:
- Queue — the named bucket jobs live in. Producers add jobs to queues.
- Producer — code that calls
queue.add(...). This is your application. - Worker — code that processes jobs from a queue. This is your background process.
The mental model: a producer publishes a job to a queue, and one or more workers consume from that queue, possibly in parallel. The queue itself is just a Redis structure — durable, visible, observable.
A fourth piece you'll meet later is the Job itself: a payload plus options like priority, delay, attempts, and a jobId for deduplication.
Step 1: A shared Redis connection
This is the first place most beginners trip. BullMQ's Queue and Worker both need a connection, and you want one connection object, not two. Two reasons: the connection is a TCP pool and you want to share it, and one config file is easier to reason about than two.
Create src/connection.ts:
import IORedis from 'ioredis';

export const connection = new IORedis({
  host: process.env.REDIS_HOST || '127.0.0.1',
  port: Number(process.env.REDIS_PORT) || 6379,
  maxRetriesPerRequest: null, // Required by BullMQ — yes, really
});
That maxRetriesPerRequest: null line is not a typo. BullMQ manages its own retry policy, and it needs the underlying Redis client to not give up. If you see "Reached the max retries per request limit" errors, that's the setting that fixes it.
Step 2: A queue
Create src/queue.ts:
import { Queue } from 'bullmq';
import { connection } from './connection';

export const emailQueue = new Queue('email', { connection });
The string 'email' is the queue name. It's the contract between the producer and the worker — they must agree on it. Pick names that mean something: email, image-resize, webhook-dispatch, export-report. Don't overthink the structure; one queue per domain, with multiple job names inside, is the pattern I keep coming back to.
Step 3: A producer
Create src/producer.ts:
import { emailQueue } from './queue';

async function sendWelcomeEmail(to: string, name: string) {
  const job = await emailQueue.add(
    'welcome-email',        // job name
    { to, name },           // job data — must be JSON-serializable
    {
      attempts: 3,                          // retry up to 3 times
      backoff: { type: 'exponential', delay: 1000 },
      removeOnComplete: true,               // don't pile up finished jobs in Redis
      removeOnFail: 100,                    // keep last 100 failures for debugging
    }
  );

  console.log(`Job ${job.id} added to the queue`);
  return job.id;
}

sendWelcomeEmail('alice@example.com', 'Alice').catch(console.error);
A few things worth pausing on:
- Job data must be JSON-serializable. Strings, numbers, plain objects, arrays. Not class instances, not functions, not
Dateobjects (send ISO strings instead). attemptsandbackoffare how you get retries for free. This job will retry with delays of ~1s, ~2s, ~4s before giving up. If you don't set these, a job that throws once goes straight to the failed set.removeOnCompletematters more than it looks. A job that completes but stays in Redis is a small data leak. Over months, with thousands of jobs per minute, this is how Redis instances quietly run out of memory.
Step 4: A worker
Create src/worker.ts:
import { Worker, Job } from 'bullmq';
import { connection } from './connection';

const worker = new Worker(
  'email',                  // same queue name as the producer
  async (job: Job) => {
    console.log(`Processing job ${job.id}:`, job.data);

    // Real work goes here. Sending an email, calling an API, etc.
    await fakeSendEmail(job.data.to, job.data.name);

    return { sent: true, at: Date.now() };
  },
  {
    connection,
    concurrency: 5,         // up to 5 jobs in parallel per worker
  }
);

async function fakeSendEmail(to: string, name: string) {
  await new Promise((resolve) => setTimeout(resolve, 1500));
  console.log(`✓ Sent welcome email to ${name} <${to}>`);
}

// Observe what happens
worker.on('completed', (job, result) => {
  console.log(`Job ${job.id} completed with result:`, result);
});

worker.on('failed', (job, err) => {
  console.error(`Job ${job?.id} failed:`, err.message);
});
The worker is a long-running process. It opens a connection to Redis, asks "any jobs for me?", picks one up, runs your function, marks the result, and loops. You typically run it as a separate process from your API — the API enqueues, the worker dequeues.
The concurrency: 5 means up to 5 jobs run in parallel inside this worker process. If you run three workers, that's 15 jobs in parallel total, all sharing the queue.
Step 5: Run it
In one terminal, start the worker:
npx ts-node src/worker.ts
In another, fire a job:
npx ts-node src/producer.ts
You should see the producer log "Job X added to the queue" and the worker log the processing flow about a second and a half later. That's the whole loop. Email without the SMTP provider, but the loop works.
The options you'll actually use
Once you have the loop, the next thing to reach for is the option object. These are the ones I use in basically every project:
await queue.add('name', payload, {
  // Schedule
  delay: 60_000,                              // run 60s from now
  repeat: { pattern: '0 9 * * *' },           // every day at 9am

  // Ordering
  priority: 1,                                // lower number = higher priority

  // Durability
  attempts: 5,
  backoff: { type: 'exponential', delay: 2000 },

  // Idempotency
  jobId: `welcome:${userId}`,                 // same id = deduped

  // Retention
  removeOnComplete: 100,                      // keep last 100
  removeOnFail: 500,                          // keep last 500
});
Some of these deserve a callout:
priorityonly matters when there's contention. If your queue is always empty, priority is invisible. Set it before you need it.repeatis its own object. A repeatable job is not the same as a job with adelay; the scheduler creates new jobs on the pattern until you remove it. Usequeue.upsertJobScheduler(...)for repeatable jobs in modern BullMQ.jobIdis the difference between "this might run twice" and "this runs once." Twoadd()calls with the samejobIdare deduplicated server-side. Use it any time the same logical event might be enqueued twice.removeOnComplete: truedeletes immediately;removeOnComplete: 100keeps the last 100. The number matters more in production than you'd think.
Errors: the part beginners skip
A worker that doesn't handle errors correctly is a worker that loses data. Three rules:
1. Throw to retry. If your function throws, BullMQ catches it, records the failure, and either retries (if attempts allows) or moves the job to the failed set. Not throwing is how a job silently does nothing and you have no idea why.
const worker = new Worker('email', async (job) => {
  const user = await db.findUser(job.data.userId);
  if (!user) {
    // Permanent — retrying won't help, skip remaining attempts
    throw new UnrecoverableError(`User ${job.data.userId} not found`);
  }
  await sendEmail(user);
}, { connection });
UnrecoverableError is the escape hatch: a job that throws this goes straight to failed, no more retries. Use it for permanent failures (validation errors, missing records, 4xx responses). Use plain throw new Error(...) for transient ones (network errors, 5xx, timeouts).
2. Listen to worker events. The default error behavior is "log to console." That's not enough. Listen to failed, log with context, and on the final attempt (when job.attemptsMade >= job.opts.attempts), alert someone. A dead job in a quiet queue is data nobody knows is missing.
3. Assume every job runs twice. Workers crash, networks blip, jobs are re-delivered. The handler must be idempotent — running it twice for the same logical event must be safe. The simplest pattern: pass an ID in the job, do work, mark a flag in the database, and short-circuit on the next run if the flag is set.
I went deep on this in the Background Jobs in NestJS with BullMQ post, but the principle is the same in vanilla Node: write the handler as if it might be called twice for the same input. It might.
Monitoring: don't ship without a dashboard
You cannot operate a queue you cannot see. The minimum viable monitoring is a UI. The standard one is Bull Board:
npm install @bull-board/api @bull-board/express express
// src/dashboard.ts
import express from 'express';
import { createBullBoard } from '@bull-board/api';
import { BullMQAdapter } from '@bull-board/api/bullMQAdapter';
import { ExpressAdapter } from '@bull-board/express';
import { emailQueue } from './queue';

const app = express();
const serverAdapter = new ExpressAdapter();
serverAdapter.setBasePath('/admin/queues');

createBullBoard({
  queues: [new BullMQAdapter(emailQueue)],
  serverAdapter,
});

app.use('/admin/queues', serverAdapter.getRouter());
app.listen(3000, () => {
  console.log('Bull Board: http://localhost:3000/admin/queues');
});
Put an auth guard in front of that route before you deploy it anywhere real. Job payloads are internal data; the dashboard shows them in plaintext.
Beyond the dashboard, two metrics are non-negotiable in production:
- Failed-job count — the rate of terminal failures. If this goes up, something downstream is broken.
- Oldest waiting-job age — backlog latency. A deep queue draining fast is fine; a shallow queue that's stuck is not.
Graceful shutdown
The thing that catches everyone the first time is what happens when you Ctrl+C a worker mid-job. If the worker dies, BullMQ will eventually re-deliver the job (this is why idempotency isn't optional), but "eventually" means after a stalled-job timeout — a delay you don't need to pay. Close the worker properly and it finishes in-flight jobs, stops taking new ones, and exits clean:
const shutdown = async (signal: string) => {
  console.log(`Received ${signal}, closing worker...`);
  await worker.close();        // waits for active jobs
  await emailQueue.close();
  await connection.quit();
  process.exit(0);
};

process.on('SIGTERM', () => shutdown('SIGTERM'));
process.on('SIGINT', () => shutdown('SIGINT'));
In production, give your orchestrator a termination grace period longer than your slowest job — or cap job runtime so it always fits. The default Kubernetes 30 seconds is a great way to lose work.
Common beginner mistakes
A short list of things I wish someone had told me earlier:
- Forgetting
maxRetriesPerRequest: null. The single most common BullMQ error message. It's not optional, even though it looks like it is. - Sharing a connection wrong. Each
QueueandWorkeraccepts a connection — you can pass the same object, and you should. - Forgetting
removeOnComplete. Redis fills up. It always does. Set retention from day one. - Putting the entity in the job payload. Pass an ID, fetch the entity in the worker. Otherwise the job runs against a stale snapshot.
- Not handling worker exit signals. Ctrl+C in development looks fine; in production it loses jobs.
- Treating the queue as a log. It isn't. A queue you never inspect is a queue where failures go silently. Use a dashboard.
What to read next
You now have a working BullMQ setup. From here, the directions worth exploring are:
- NestJS integration — if your app uses Nest, Background Jobs in NestJS with BullMQ covers processors, dependency injection, and the production patterns I actually ship.
- Workflows — parent/child jobs for multi-step pipelines.
- Rate limiting — the built-in limiter for "the third-party API allows 100 requests per minute."
- Prometheus and Grafana — for when Bull Board isn't enough.
The mental model that ties all of it together is the same one from the top: separate what must happen now from what must happen eventually. The mechanics change; that line doesn't.
Working on something like this?
I take on backend, payments and deployment projects. I reply within one working day.