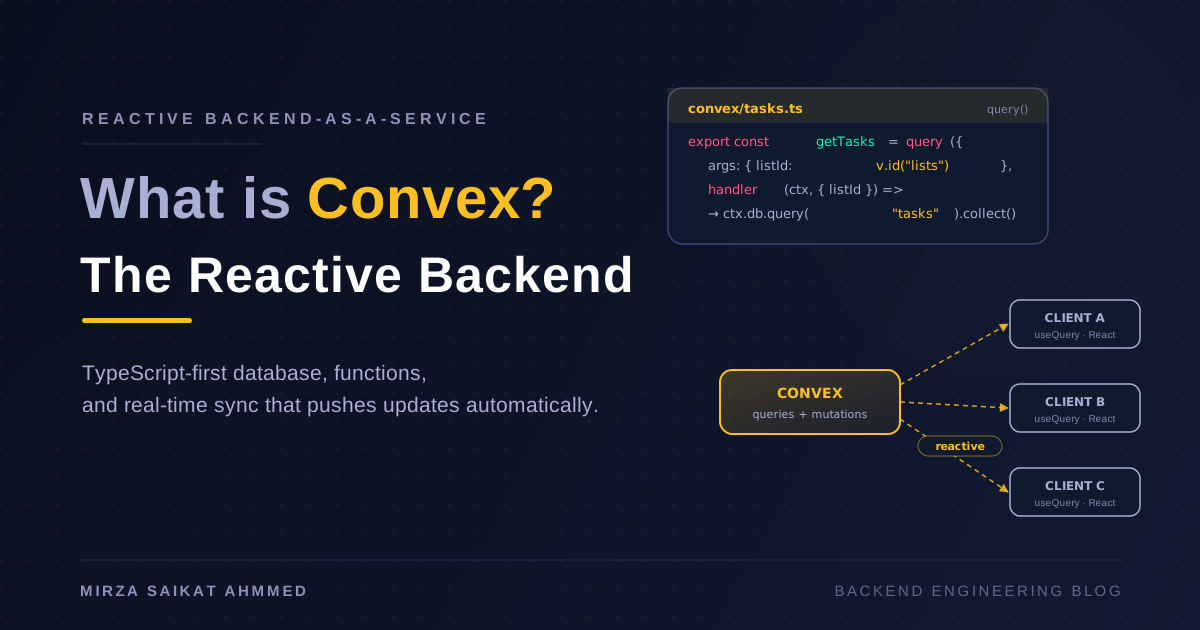
Most "getting started" tutorials assume you're starting from an empty repo, have already picked a framework, and aren't worried about any of the half-dozen small errors that show up when you actually try to follow the instructions on a real machine. This guide is the one I wish I'd had: it walks through installing Convex locally, wiring it to a real app, and shipping the first reactive component — with the exact commands, the order to run them in, and the things that go wrong if you skip a step.
By the end you'll have a Convex project running on your machine talking to a real backend on Convex's cloud, a schema with a couple of tables, two queries, a mutation, and a React component that updates itself the instant any other connected client changes data.
What you'll need
- Node.js 20.x or later. Check with
node -v. Older versions work but you'll see warnings. - npm, pnpm, or yarn — I'll use
npmfor consistency. - A Convex account. Free tier is enough. Sign up at convex.dev — you can use GitHub OAuth and skip the password entirely.
- A Next.js project (or any React project, really). I'll generate one fresh below, but the same flow works with Vite, Remix, Astro, or plain React.
If you've never used Convex before, skim my intro to Convex first — this post assumes you know what a query, mutation, and action are.
Step 1 — Create a fresh project
I'm going to use Next.js because it's the most common pairing, but the Convex setup is identical for any React framework.
npx create-next-app@latest convex-todo --typescript --tailwind --app --src-dir --import-alias "@/*"
cd convex-todo
The flags:
--typescript— Convex is TypeScript-first, you want this.--app— uses the App Router (modern Next.js default).--src-dir— keeps your code undersrc/.--import-alias "@/*"— Convex's generated client uses path aliases; this matches.
If you already have a project, skip this and cd into it instead.
Step 2 — Install Convex
npm install convex
That's the runtime client — useQuery, useMutation, the ConvexProvider you'll see in a minute.
Step 3 — Run npx convex dev for the first time
This is the magical step. From your project root:
npx convex dev
The first time you run this, four things happen:
- Browser opens for login. Sign in with whatever method you used at signup. If you're already authenticated via the CLI, it skips this.
- "Create a new project?" prompt. Type a name (e.g.
convex-todo) and hit enter. This creates a development deployment on Convex's cloud. convex/directory gets created with an example schema, atasks.tsfile, and a_generated/folder..env.localis updated withNEXT_PUBLIC_CONVEX_URL=...pointing at your dev deployment.
npx convex dev is a long-running process — it watches your convex/ folder and pushes every change to the cloud backend in real time. Leave it running in its own terminal.
You'll see something like:
✔ Convex functions ready! (development deployment: brave-otter-123)
The animal-name combo is your project identifier. Bookmark it.
Step 4 — Wire Convex into your React app
Open src/app/layout.tsx and wrap the children in ConvexProvider:
// src/app/layout.tsx
import type { Metadata } from "next";
import "./globals.css";
import { ConvexClientProvider } from "./convex-client-provider";

export const metadata: Metadata = {
  title: "Convex Todo",
};

export default function RootLayout({
  children,
}: Readonly<{ children: React.ReactNode }>) {
  return (
    <html lang="en">
      <body className="antialiased">
        <ConvexClientProvider>{children}</ConvexClientProvider>
      </body>
    </html>
  );
}
Create the provider component:
// src/app/convex-client-provider.tsx
"use client";

import { ConvexReactClient } from "convex/react";
import { ConvexProvider } from "convex/react";
import type { ReactNode } from "react";

const convex = new ConvexReactClient(process.env.NEXT_PUBLIC_CONVEX_URL!);

export function ConvexClientProvider({ children }: { children: ReactNode }) {
  return <ConvexProvider client={convex}>{children}</ConvexProvider>;
}
Two important things:
"use client"— Next.js App Router requires client components for hooks. The provider must be a client component.process.env.NEXT_PUBLIC_CONVEX_URL!— the!tells TypeScript "trust me, this is set." If the env var is missing you'll get a runtime error on first render; verify it's in.env.local.
If you skipped --src-dir during create-next-app, put convex-client-provider.tsx at app/convex-client-provider.tsx and adjust the import path.
Step 5 — Start the Next.js dev server
In a second terminal (leave the npx convex dev one running):
npm run dev
Open http://localhost:3000. You should see the default Next.js landing page. If you do, everything is wired correctly — Convex is sitting quietly in the background, ready to be called.
Step 6 — Define a schema
Replace the auto-generated convex/schema.ts with a real one. Open it:
// convex/schema.ts
import { defineSchema, defineTable } from "convex/server";
import { v } from "convex/values";

export default defineSchema({
  todos: defineTable({
    text: v.string(),
    completed: v.boolean(),
    createdAt: v.number(),
  }).index("by_completed", ["completed"]),
});
Save it. Watch the npx convex dev terminal — within a second or two it'll say something like:
✔ Schema updated
The schema is now live on your dev deployment. The by_completed index lets you query todos filtered by their completed status efficiently — you'll see it used in a moment.
Step 7 — Write your first query and mutation
Open convex/todos.ts (it may have been auto-created during init; if not, create it):
// convex/todos.ts
import { query, mutation } from "./_generated/server";
import { v } from "convex/values";

// QUERY — read-only, reactive, automatically re-runs when data changes
export const list = query({
  args: {},
  handler: async (ctx) => {
    return await ctx.db
      .query("todos")
      .withIndex("by_completed")           // uses the index we defined
      .order("desc")                       // newest first
      .collect();
  },
});

// QUERY — counts how many are pending
export const pendingCount = query({
  args: {},
  handler: async (ctx) => {
    const pending = await ctx.db
      .query("todos")
      .withIndex("by_completed", (q) => q.eq("completed", false))
      .collect();
    return pending.length;
  },
});

// MUTATION — runs inside an ACID transaction
export const create = mutation({
  args: { text: v.string() },
  handler: async (ctx, { text }) => {
    const trimmed = text.trim();
    if (!trimmed) throw new Error("Todo text cannot be empty");

    return await ctx.db.insert("todos", {
      text: trimmed,
      completed: false,
      createdAt: Date.now(),
    });
  },
});

// MUTATION — toggle a single todo
export const toggle = mutation({
  args: { id: v.id("todos") },
  handler: async (ctx, { id }) => {
    const todo = await ctx.db.get(id);
    if (!todo) throw new Error("Todo not found");
    await ctx.db.patch(id, { completed: !todo.completed });
  },
});

// MUTATION — delete a todo
export const remove = mutation({
  args: { id: v.id("todos") },
  handler: async (ctx, { id }) => {
    await ctx.db.delete(id);
  },
});
Save the file. The npx convex dev terminal will show:
✔ Convex functions ready!
✔ Functions updated (5 functions)
Five functions deployed, no manual build step, no manual restart. That's the dev loop.
Step 8 — Call them from a React component
Replace src/app/page.tsx with a real todo list:
// src/app/page.tsx
"use client";

import { useState } from "react";
import { useQuery, useMutation } from "convex/react";
import { api } from "../convex/_generated/api";
import type { Id } from "../convex/_generated/dataModel";

export default function Home() {
  const todos = useQuery(api.todos.list);
  const pendingCount = useQuery(api.todos.pendingCount);
  const create = useMutation(api.todos.create);
  const toggle = useMutation(api.todos.toggle);
  const remove = useMutation(api.todos.remove);

  const [text, setText] = useState("");

  if (todos === undefined) {
    return <div className="p-8 text-gray-400">Loading…</div>;
  }

  async function onAdd(e: React.FormEvent) {
    e.preventDefault();
    if (!text.trim()) return;
    await create({ text });
    setText("");
  }

  return (
    <main className="mx-auto max-w-xl p-8">
      <h1 className="text-3xl font-bold mb-2">Convex Todo</h1>
      <p className="text-sm text-gray-500 mb-6">
        {pendingCount} pending · {todos.length - (pendingCount ?? 0)} done
      </p>

      <form onSubmit={onAdd} className="flex gap-2 mb-6">
        <input
          value={text}
          onChange={(e) => setText(e.target.value)}
          placeholder="What needs doing?"
          className="flex-1 rounded border border-gray-700 bg-transparent px-3 py-2 outline-none focus:border-amber-400"
        />
        <button
          type="submit"
          className="rounded bg-amber-500 px-4 py-2 font-medium text-black hover:bg-amber-400"
        >
          Add
        </button>
      </form>

      <ul className="space-y-2">
        {todos.map((t) => (
          <li
            key={t._id}
            className="flex items-center gap-3 rounded border border-gray-800 px-3 py-2"
          >
            <input
              type="checkbox"
              checked={t.completed}
              onChange={() => toggle({ id: t._id as Id<"todos"> })}
            />
            <span
              className={t.completed ? "flex-1 line-through text-gray-500" : "flex-1"}
            >
              {t.text}
            </span>
            <button
              onClick={() => remove({ id: t._id as Id<"todos"> })}
              className="text-xs text-gray-500 hover:text-red-400"
            >
              delete
            </button>
          </li>
        ))}
      </ul>
    </main>
  );
}
Save the file. The Next.js dev server hot-reloads within a second. Open the page in your browser — you'll see "Loading…" briefly, then an empty list.
Now open the same page in a second browser window (or an incognito window). Add a todo in window A. Watch window B. The todo appears in window B within ~100 ms with no refresh, no websocket code, no manual invalidation. That's the reactive model working.
What the dev loop actually looks like
You'll have two terminals running:
Terminal 1: npx convex dev
- Watches
convex/for changes - Pushes functions and schema to the cloud backend on every save
- Generates TypeScript types in
convex/_generated/(your IDE picks them up automatically) - Prints function logs as you exercise the API
Terminal 2: npm run dev
- Standard Next.js dev server
- Hot-reloads on React file changes
- Pulls
NEXT_PUBLIC_CONVEX_URLfrom.env.local
The round-trip on a single edit is fast — typically under 1.5 seconds from save to type-on-the-client. That's why the loop is satisfying: you save a function, your editor immediately knows its types, and the deployed backend is already running the new version.
A few things that go wrong (and how to fix them)
These are the actual errors you'll hit. Save this section.
1. Module not found: Can't resolve 'convex/_generated/api'
The _generated/ folder hasn't been created yet. Make sure npx convex dev is running and has finished its first sync. If you killed it earlier, restart it.
2. NEXT_PUBLIC_CONVEX_URL is not defined
.env.local is missing or npx convex dev never wrote to it. Check the file exists at the project root and contains the variable. Restart both dev servers if you just created it — Next.js only loads env vars at startup.
3. useQuery returned undefined even though I have data
useQuery returns undefined while the initial query is in flight. The right pattern is if (todos === undefined) return <Loading />. Trying to .map() over undefined will crash. The example above shows the pattern.
4. Functions deploy but I see "Could not find function" on the client
Your function isn't exported, or it's behind a typo. Functions must be exported to be callable via api.*. The client only knows about exported names.
5. Schema changes aren't showing up in the dashboard
The Convex dashboard's data browser needs a schema to know how to render tables. If you changed the schema and the data browser still looks empty, hard-refresh the dashboard tab.
6. Slow first request after a long pause (cold starts)
Cold starts are real. The first function call after a deploy or after ~15 minutes of inactivity takes 200–500 ms. Subsequent calls are 20–50 ms. This is normal and improves as Convex's platform evolves.
Where to go from here
You now have the minimum viable Convex app. From here, the natural next steps are:
- Add auth. Convex is unopinionated — most projects use Clerk or Auth0. Wrap your mutations in an identity check via
ctx.auth.getUserIdentity(). - Add an action for external APIs. Mutations and queries can't call
fetch; that's whatactionis for. Common pattern: action calls OpenAI, then calls a mutation to store the result. - Add vector search. Replace your
.searchIndex()with a.vectorIndex()for AI-powered semantic search. Convex ships this built-in — no separate vector DB to manage. - Add a cron job. Drop a
convex/crons.tsfile withcrons.interval(...)orcrons.cron(...)and it'll start running automatically. - Deploy.
npx convex deployproduces a production deployment. Set up GitHub integration in the dashboard to get preview deployments per PR.
The local development story is the part Convex got the most right. Once you have the two-terminal loop going — convex dev on one side, your framework's dev server on the other — the rest is just writing TypeScript functions and calling them from React. No glue code, no boilerplate, no "did I forget to invalidate the cache?" — just code that works.
That's the whole point. Get the loop running once, and you stop fighting your backend and start shipping features.
Quick reference: commands you'll run over and over
# first time only
npx convex dev                     # sets up your dev deployment
npm install convex                 # in an existing project

# every day
npx convex dev                     # terminal 1 — backend sync
npm run dev                        # terminal 2 — your framework

# when you're ready to ship
npx convex deploy --prod           # creates production deployment
npx convex dashboard               # opens the dashboard in your browser
npx convex logs                    # tails function logs in the terminal
npx convex run <funcName> '{...}'  # invoke a function from the CLI for debugging
That's it. Save the dashboard URL for your project, keep both terminals running, and start writing the queries you wish every backend had.
Sources:
Working on something like this?
I take on backend, payments and deployment projects. I reply within one working day.